



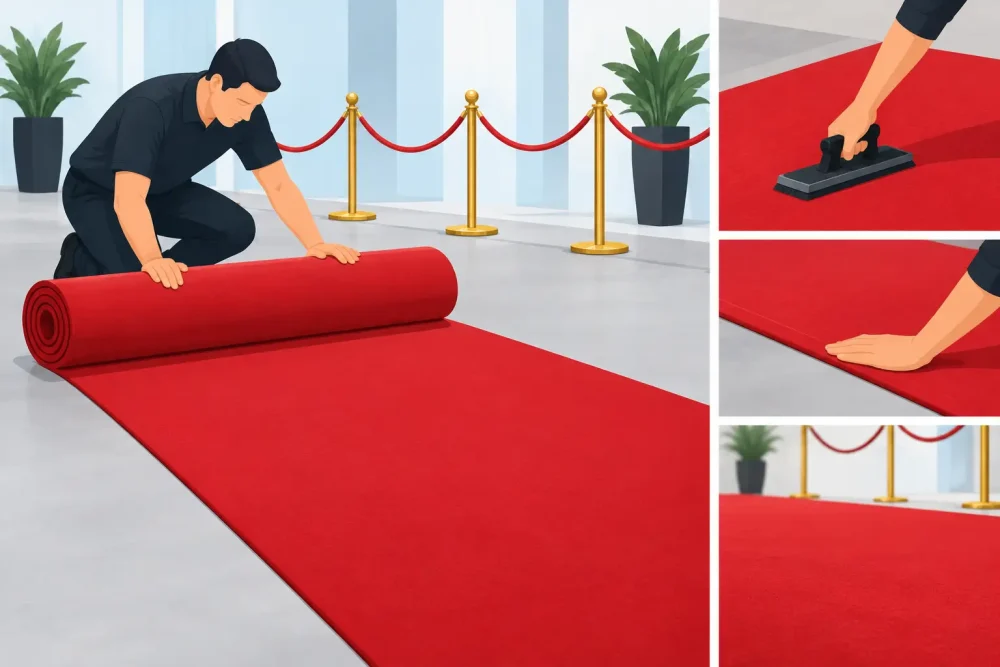
A beautiful runner can lose its impact fast when it ripples underfoot, shifts during photos, or ends with curled corners. Knowing how to install event carpet properly turns a simple flooring detail into a polished entrance, aisle, runway, or branded pathway guests can use with confidence. The goal is not just a great reveal. It is a clean, secure surface that stays in place through arrivals, ceremonies, speeches, and heavy foot traffic.
Prepare the Site Before the Carpet Arrives
Installation starts with the floor, not the roll. Measure the full route and note every doorway, transition, curve, step, floor drain, or threshold that could affect the layout. Add a little length for final trimming, but do not assume a runner can be stretched into place if it comes up short. Carpet needs to lie naturally to stay flat.
Inspect the surface closely. Indoor event carpet performs best over a clean, dry, level floor. Sweep or vacuum away grit that could create visible bumps or keep tape from adhering. On concrete, make sure the surface is dry and free of dust. On wood, tile, or polished stone, use a tape that is appropriate for finished floors and test it in a discreet area first.
Outdoor installations need another layer of planning. Grass, pavers, decking, and asphalt each create different challenges. Mow or clear grass before setup, remove stones and debris, and avoid laying carpet over standing water or mud. If the ground is uneven, a lightweight carpet may follow every dip beneath it. That can be acceptable for a casual garden walkway, but a formal ceremony aisle or photo backdrop may need a flatter base.
Temperature matters, too. Bring the roll to the event site early when possible. Carpet that has been tightly rolled during shipping needs time to relax, especially in cold weather. Giving it a chance to settle before final securing is one of the easiest ways to prevent curled edges.
Choose the right tape for the surface
The tape should match both the carpet and the venue floor. Double-sided carpet tape is a strong choice for many smooth, sealed indoor surfaces when used according to the venue’s requirements. For temporary outdoor setups or rougher surfaces, installation tape designed for event flooring can provide more holding power. Never assume a tape is safe for a finished floor without testing it first.
Avoid relying on duct tape for a visible installation. It can leave residue, look unprofessional, and may not hold a carpet edge flat. Also confirm whether the venue has rules about adhesives, residue removal, or fastening methods. Historic venues, ballrooms, convention centers, and tented events often have specific flooring policies.
How to Install Event Carpet Step by Step
Start by placing the roll at the beginning of the guest path, with the pile or visible finish facing the direction you want guests and cameras to see. If multiple pieces are being installed, plan the entire layout before attaching anything. This is particularly important for logo rugs, custom graphics, or colored runners that need to line up with a stage, doorway, or ceremony focal point.
Dry-fit the runner first
Unroll the carpet slowly along the marked path without tape. Let it rest flat, then check the width from several points rather than measuring only at the entrance. A runner centered at one end can drift noticeably by the time it reaches the altar, stage, or step-and-repeat.
For a straight aisle, use a chalk line, low-tack floor marking, or a measured reference point along the walls to keep the route true. For a curved arrival path, make gradual adjustments as you unroll. Sharp bends can cause buckling, particularly with wider carpet or turf runners.
If the carpet extends beyond the planned endpoint, trim only after the runner is fully positioned. Use a sharp utility knife, a straightedge, and a protected cutting surface when possible. Make deliberate cuts from the back of the material for better control. Replace dull blades frequently, since a ragged edge is very noticeable in event photography.
Secure the center, then the perimeter
Once the dry fit looks right, roll back one end at a time rather than lifting the whole runner. Apply tape in manageable sections, beginning near the center line or center section and working outward. This approach keeps the carpet aligned and prevents it from wandering as you secure it.
For a standard runner in a low-to-moderate traffic setting, tape along both long edges and across the ends. Add cross strips at intervals for longer runs, high-traffic entrances, or areas where guests may pivot, dance, or stop for photos. Press the carpet firmly into the adhesive as you go, using clean hands, a roller, or a flat board wrapped in a soft cloth.
Do not pull the carpet tight as you tape it down. Tension can create waves later, especially if the temperature changes. Let the material rest naturally, smooth it from the center toward the edges, and secure it without stretching. If a small ripple appears, lift that section carefully, reposition it, and reapply fresh tape rather than trying to force it flat.
Finish edges and seams with care
Edges are where most temporary carpet installations succeed or fail. Walk the full perimeter and press down every corner. Pay close attention to the first few feet at an entrance, where heels, carts, and rolling equipment can catch an unsecured edge.
When two carpet pieces meet, create a tight butt seam rather than overlapping them. An overlap can become a trip point and creates a visible line in photos. Use tape beneath the seam when the backing and installation conditions allow, then bring the edges together evenly. With directional pile or ribbed material, make sure both sections run the same way before securing them.
At doorways and thresholds, keep carpet clear of moving doors and avoid building up material where guests step from one surface to another. If the route includes stairs, ramps, or a change in elevation, use a fastening method approved for that location and consult the venue or production lead. Safety has to lead the design decision.
Adjust the Method for Outdoor and High-Traffic Events
An outdoor aisle at a wedding and a red-carpet arrival for hundreds of guests should not be installed exactly the same way. For grass, secure the carpet only after confirming the ground is dry and level enough for the event. Depending on venue permissions and the product, outdoor-rated tape or approved anchoring methods may be needed at the edges. Do not create raised fastening points that guests can catch with shoes.
For corporate activations, fashion shows, and public-facing events, anticipate rolling cases, stanchions, cameras, and repeated foot traffic. Use more tape than you would for a short ceremony aisle, especially at transitions and photo moments. If an installation will run for several days, build in time for daily edge checks. A five-minute inspection before doors open can prevent a visible and avoidable problem.
Weather also changes the plan. Wind can lift a lightweight runner before the event begins, while direct sun can heat some surfaces and affect adhesive performance. Rain can make any temporary floor covering unsafe. Have a contingency plan that includes moving the installation, delaying placement until conditions improve, or using an approved protective base.
Last Checks Before Guests Arrive
Walk the carpet in the same direction guests will travel. Wear the type of shoe most likely to be used at the event, such as heels for a wedding aisle or dress shoes for a gala. Look for soft spots, raised seams, corners that lift, and tape that shows beyond the edge.
Then view it from the camera angles that matter. Stand at the entrance, at the end of the aisle, and from the stage or photo area. Small alignment issues are easier to correct before floral installations, stanchions, furniture, or guests arrive.
Keep a small repair kit nearby with matching tape, a sharp knife, scissors, cleaning cloths, and a spare carpet piece if the project is large. Event Rugs can help match runners, turf, custom shapes, and installation supplies to the demands of the space, but the final site check is what protects the finished look.
When the carpet is flat, secure, and aligned with the event’s focal point, it does more than cover the floor. It gives every arrival, walk down the aisle, and branded photo a stronger place to begin.